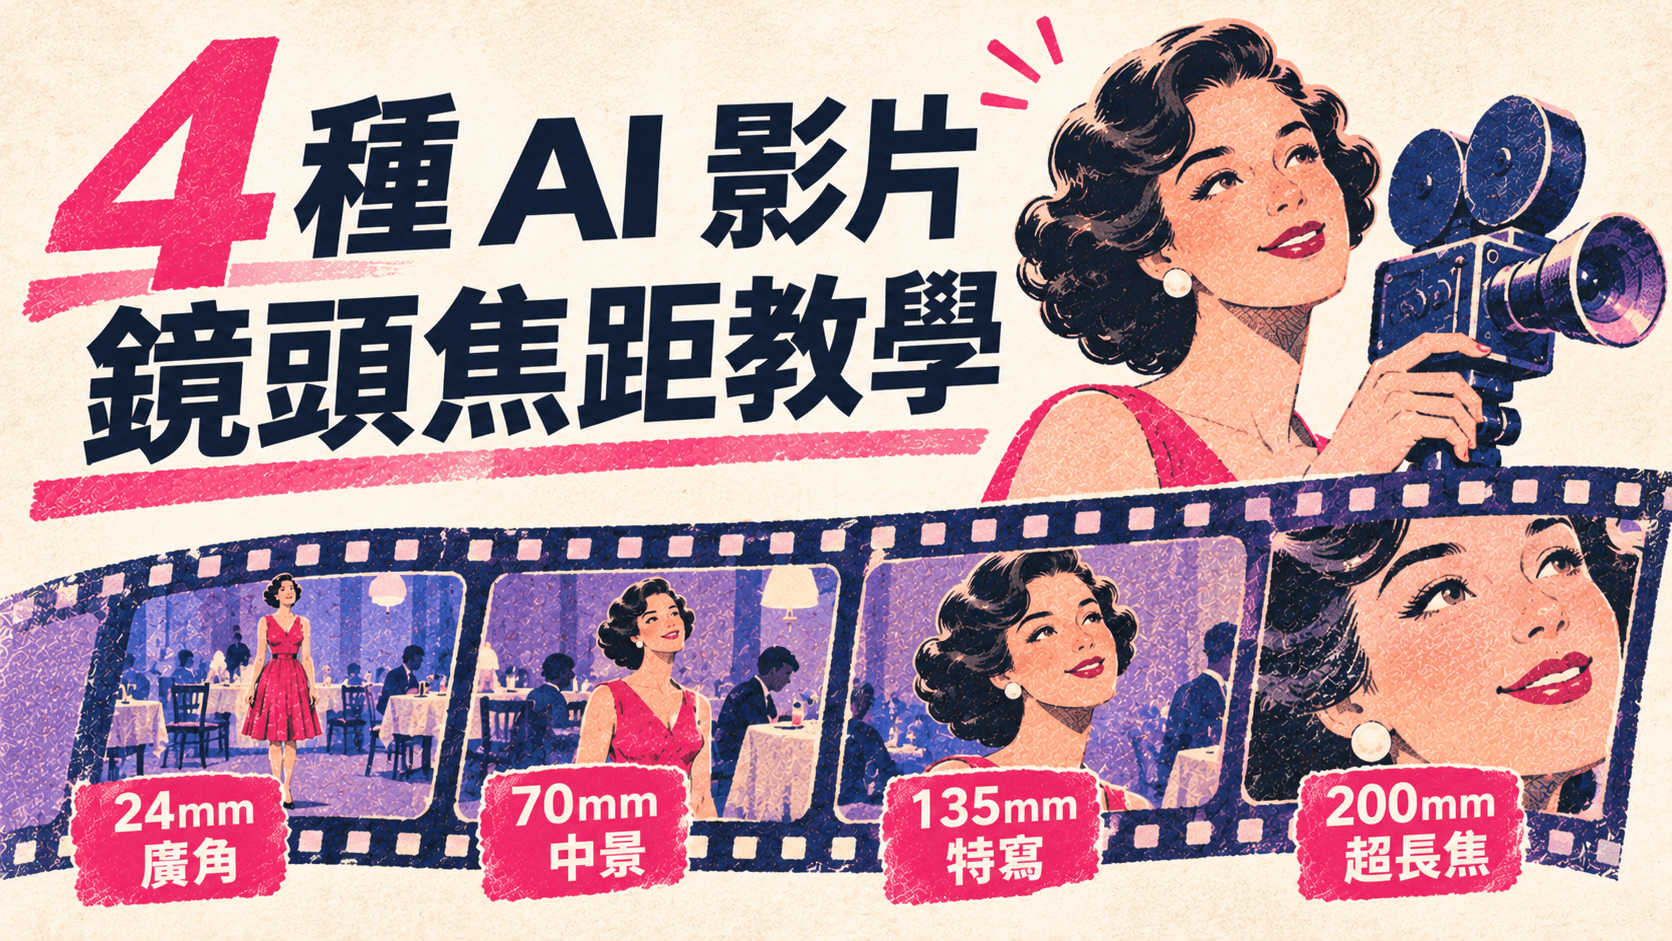
Ever asked AI to generate a close-up of someone's face, only to end up with a full-body shot?
This usually happens because your prompt doesn't clearly specify the focal length and framing you want.
By understanding four commonly used focal lengths—24mm, 70mm, 135mm, and 200mm—you can gain much better control over how large your subject appears, how much of the background is visible, and where viewers focus their attention.
In this guide, we'll break down what each focal length does and show you how to write effective AI prompts to get the shots you're looking for.
Get 500 Free Credits and Start Creating!
1. What Is Focal Length?
Focal length is measured in millimeters (mm) and affects how much of a scene your camera can capture.
When both your camera and subject stay in the same position:
- Short focal lengths (e.g., 24mm): Provide a wider field of view, allowing you to capture more of the surrounding environment.
- Long focal lengths (e.g., 135mm): Provide a narrower field of view, making your subject appear larger in the frame while showing less of the background.
However, focal length alone doesn't determine whether you get a full-body shot or a close-up. Even with a 135mm lens, you can still capture a full-body shot if the camera is far enough away.
That's why your AI prompt should specify both the focal length and exactly how much of your subject should appear in the frame.
2. Which Focal Length Should You Choose?
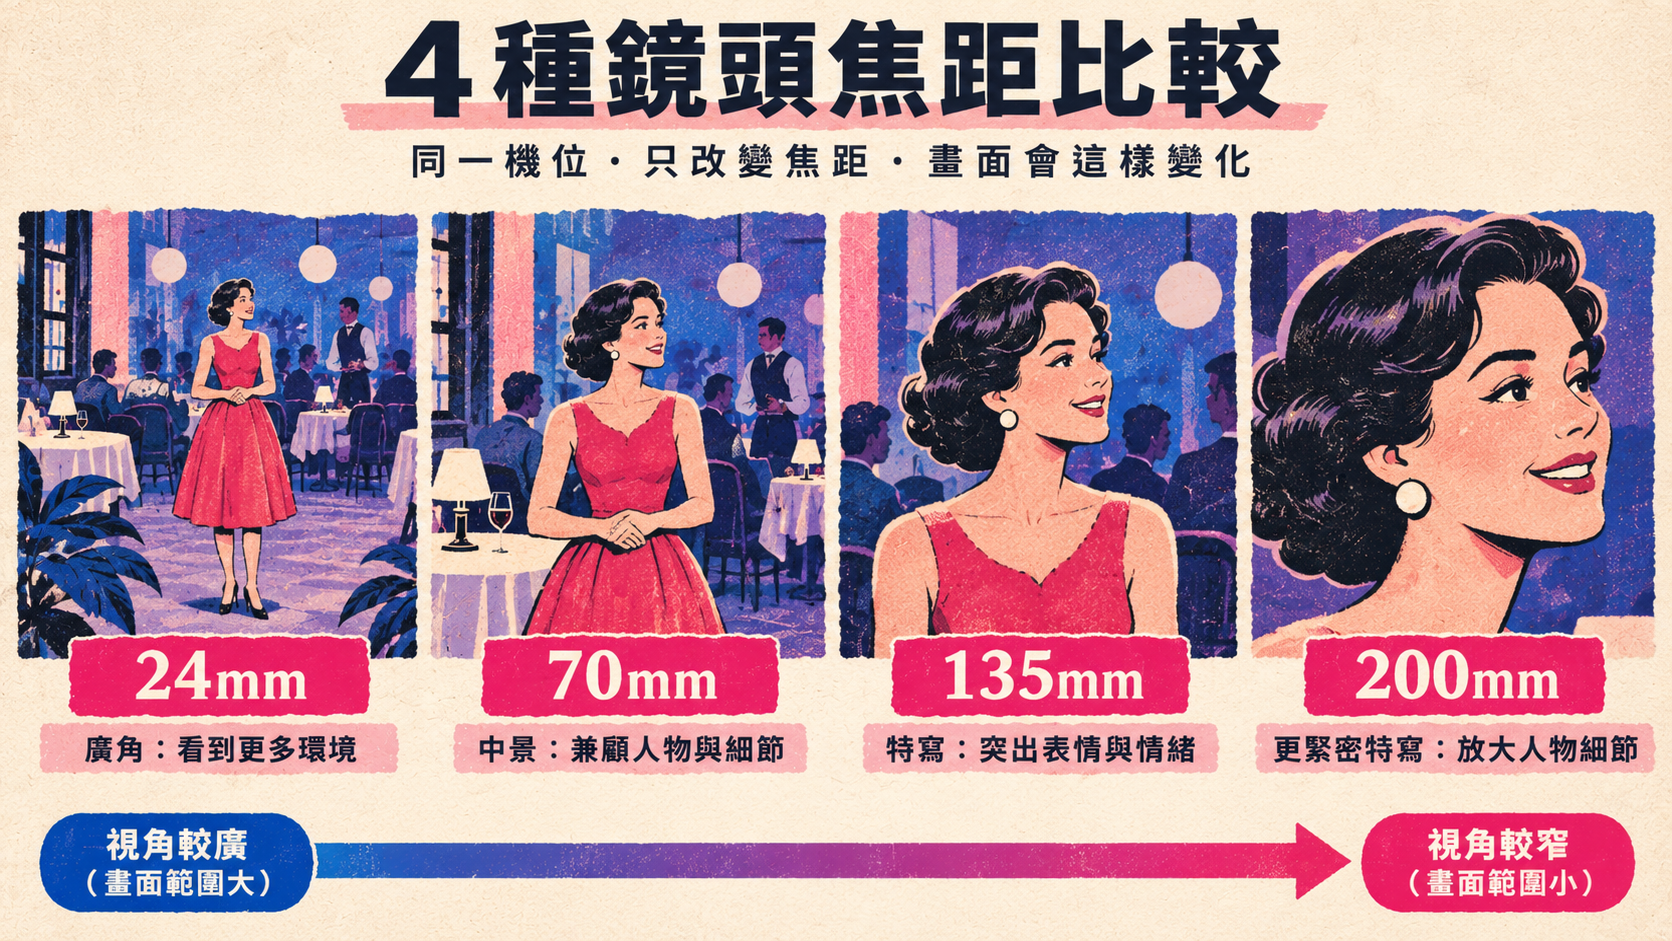
These are practical framing recommendations, not strict rules. All focal lengths mentioned in this guide refer to full-frame equivalents.
3. How to Write an Effective AI Camera Prompt
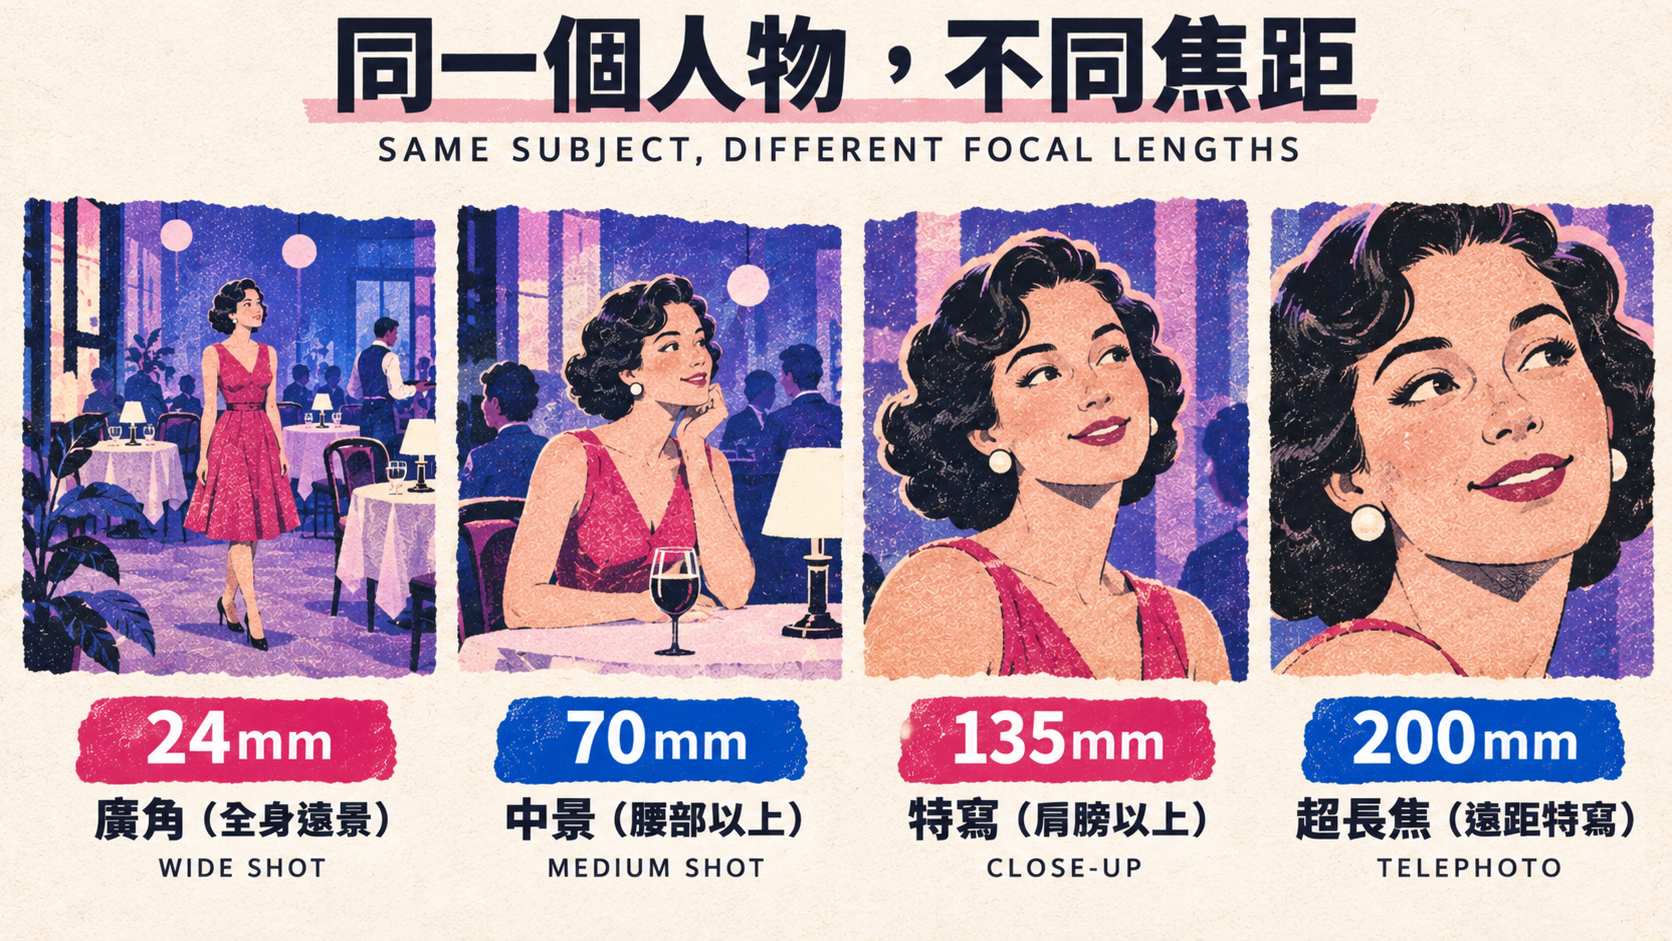
To help AI understand exactly what kind of shot you want, structure your prompt in this order
- 1Shot Composition
- 2Focal Length
- 3Subject Framing
- 4Subject Action
- 5Camera Movement
For example, instead of simply writing:
"135mm lens"
Try something more specific.
Example AI Prompt:
Create a close-up shot framed from the shoulders up, with the visual characteristics of a 135mm full-frame equivalent lens. Keep the subject's entire head within the frame, with their eyes and facial expression clearly visible. The subject looks toward the camera with a subtle smile. Keep the camera in a fixed position with only slight, natural handheld movement. No zooming.
This gives AI a much clearer understanding of the shot you're trying to create.
Keep in mind that AI-generated lens effects may not perfectly replicate the optical properties of real camera lenses. Always review the generated footage to make sure the subject's size, background visibility, and composition match your expectations.
4. Four Ready-to-Use AI Prompts for Different Focal Lengths
Here are four English prompts you can copy and use directly. Feel free to customize them by adding details about your character, setting, lighting, aspect ratio, and video duration.
1. 24mm Wide-Angle Lens: Show the Subject and Environment
A 24mm lens works well for establishing shots, helping viewers understand where the story takes place and how the subject relates to their surroundings.
AI Prompt:
Create a full-body wide shot with the visual characteristics of a 24mm full-frame equivalent wide-angle lens. Keep the subject fully visible from head to toe, with plenty of space around them and a clearly visible background environment. Avoid placing the subject too close to the edges of the frame.
The subject naturally takes one step forward and looks around the environment. Keep the camera in a fixed position with only slight, natural handheld movement. No zooming or camera repositioning.
2. 70mm Medium Telephoto Lens: Capture Outfit and Movement Details
A 70mm lens is useful when you want to show facial expressions, clothing details, and hand movements within the same shot.
AI Prompt:
Create a medium shot framed from the waist up, with the visual characteristics of a 70mm full-frame equivalent medium telephoto lens. Keep the subject's entire head and both hands fully visible, with only a small amount of background detail in the frame.
The subject gently adjusts their sleeve cuffs, then looks toward the camera. Keep the camera in a fixed position with only slight, natural handheld movement. No zooming or camera repositioning.
3. 135mm Telephoto Lens: Highlight Facial Expressions and Emotions
A 135mm lens is ideal for emphasizing eye contact, subtle smiles, and small emotional changes, keeping the viewer's attention on the subject's reaction.
AI Prompt:
Create a close-up shot framed from the shoulders up, with the visual characteristics of a 135mm full-frame equivalent telephoto lens. Keep the subject's entire head within the frame, with their eyes in sharp focus and their facial expressions clearly visible and natural.
The subject slowly turns their head toward the camera and gives a subtle, thoughtful smile, accompanied by natural blinking and gentle breathing. Keep the camera in a fixed position with only slight, natural handheld movement. No zooming or camera repositioning.
4. 200mm Super Telephoto Lens: Capture Close-Ups from a Distance
A 200mm lens is particularly useful for capturing close-ups from farther away, whether you're filming on a street, in a courtyard, or inside a large building.
AI Prompt:
Create a head-and-shoulders close-up with the visual characteristics of a 200mm full-frame equivalent super telephoto lens. Position the camera far away from the subject while keeping their head and shoulders filling most of the frame.
The subject pauses their work and looks up toward the camera. Keep their eyes in sharp focus and their expression natural. Maintain the camera's original distant position, with only slight, natural handheld movement. No zooming or moving the camera closer to the subject.
Quick Tip: If you're using a reference image as the first frame of your AI video, make sure you've already created the correct composition before animating it. Your first-frame image determines how the shot will look when the video begins.
5. How to Compare 24mm, 70mm, and 135mm Lenses
Want to see how different focal lengths affect your footage?
Try creating three shots using the exact same character and environment.
For an accurate comparison, keep these settings identical:
- Subject and camera positions
- Camera height and shooting direction
- Lighting, aspect ratio, and sensor format
Then change only the focal length, using 24mm, 70mm, and 135mm in sequence.
AI Prompt:
Create three shots of the same subject in the same environment, each using a different focal length.
All three shots must maintain the exact same camera position, camera height, shooting direction, subject position, sensor format, and aspect ratio.
Use a 24mm lens for the first shot, a 70mm lens for the second, and a 135mm lens for the third.
Only change the focal length. Do not move the camera or subject to compensate for framing. As the focal length increases, the framing should progressively tighten, the subject should appear larger, and less of the background should remain visible.
For more consistent results, we recommend generating three separate reference images first, each with a different focal length.
Once you've confirmed that the framing looks right, animate each image into its own video.
Keep your character's movements simple so they don't distract from the focal length comparison.
6. Three Common Camera Concepts You Should Know
1. Focal Length Is Not the Same as Camera Distance
Changing the focal length affects the camera's field of view.
Physically moving the camera, on the other hand, changes the perspective, including the relative sizes of foreground and background objects.
If you want to compare focal lengths accurately, keep both the camera and subject in the same positions.
2. A Close-Up Doesn't Automatically Mean a Blurry Background
A close-up describes how much of your subject fills the frame.
Background blur is a separate visual effect.
If you want your subject to stay sharp while the background appears softly blurred, add this line to your prompt:
Create a naturally soft, blurred background while keeping the subject's eyes in sharp focus.
3. Focal Length Is Not the Same as Camera Movement
Here are three concepts that are easy to confuse:
- 200mm Lens: Refers to the focal length of the lens.
- Crash Zoom: A rapid change in focal length during a shot.
- Dolly In: A physical camera movement toward the subject.
If you want your video to begin with a close-up, all you need to write is:
The shot begins immediately with a close-up of the subject's face.
There's no need to add a camera push-in unless you actually want viewers to see the camera moving closer to the subject.
7. Practice: Create a Cinematic Sequence Using Two Focal Lengths
Try creating these two shots using the same character.
Shot 1: 24mm Wide-Angle
Start by showing the environment around your character, establishing where the story takes place.
Shot 2: 135mm Close-Up
Then cut to a close-up of the character's face, highlighting their eyes or a subtle emotional reaction.
This simple sequence moves naturally from establishing the scene to emphasizing emotion, giving your AI-generated video a more cinematic feel.
Remember: Focal length is just one way to help AI understand your visual intentions. What matters most is clearly describing how your subject should be framed and exactly what viewers should see.
Get 500 Free Credits and Start Creating!
How to Create Consistent AI Character Sheets in 3 Simple Steps
One of the biggest challenges in AI video generation is keeping characters consistent across different shots.
You might start with a character who looks perfect in one scene, only to discover that their face, hairstyle, or outfit has completely changed in the next.
One way to reduce these inconsistencies is to create a detailed character reference sheet (also called a character sheet) before generating your video. This gives AI a clear visual reference to follow.
In this tutorial, we'll walk you through three simple steps to create an effective character sheet, complete with ready-to-use English prompts.
Step 1: Create a Three-View Character Sheet
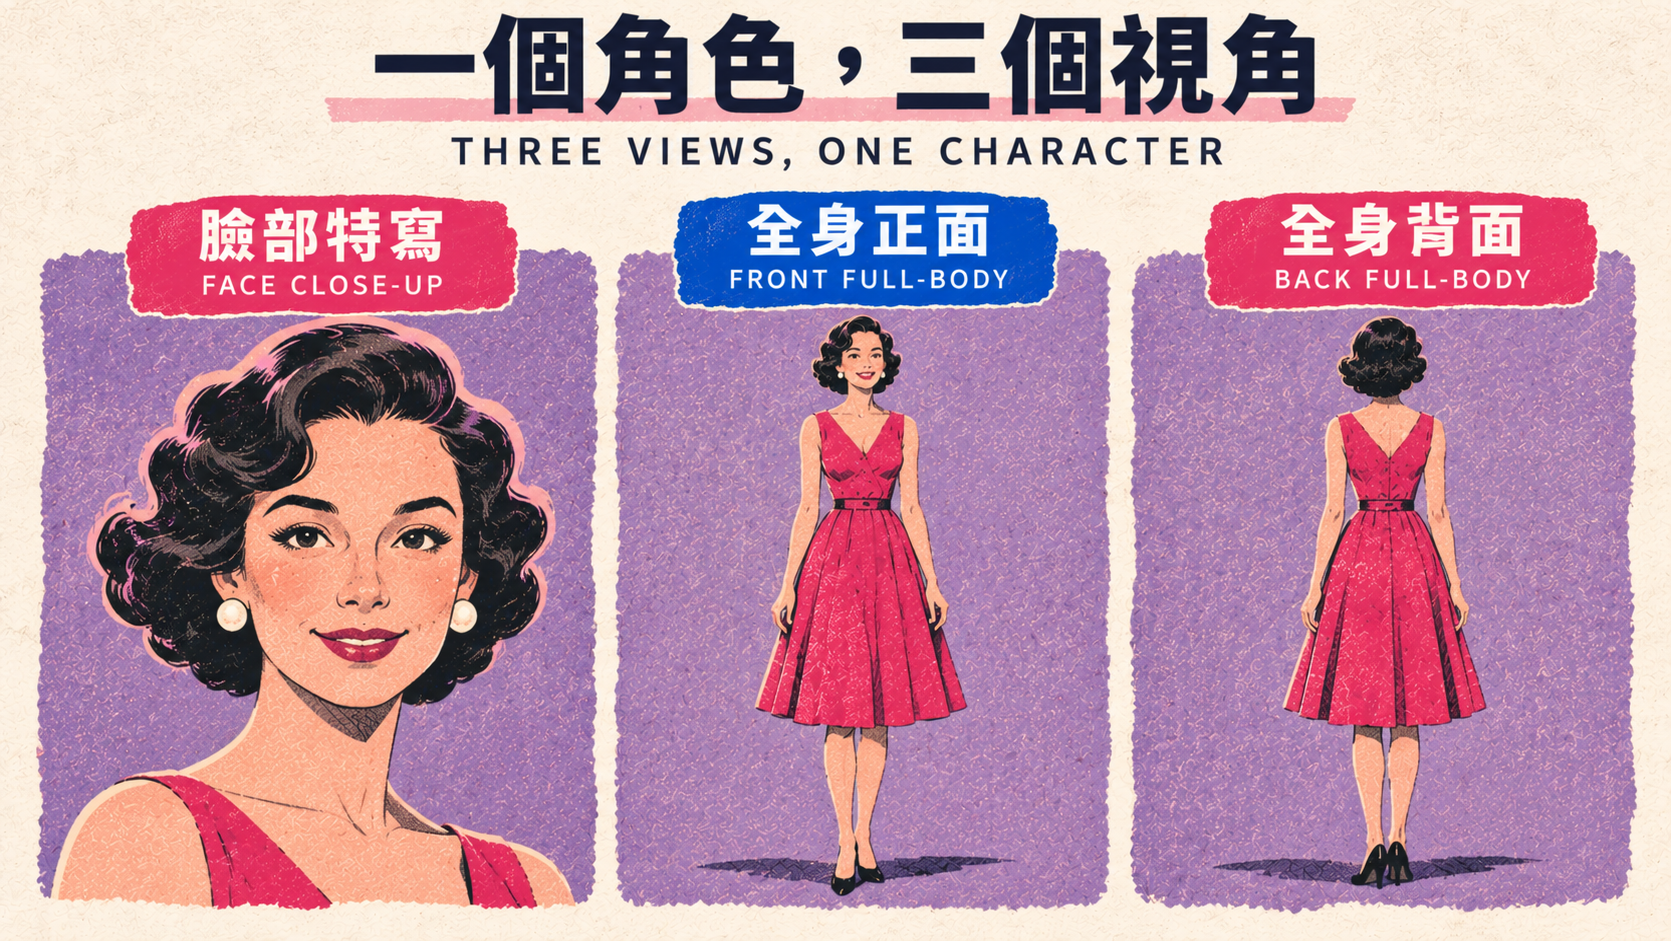
Start with a 16:9 landscape canvas and arrange three different views of the same character side by side.
Your character sheet should include:
1. Face Close-Up
Show the character's head and shoulders, making sure their facial features, hairstyle, and identifying details are clearly visible.
2. Full-Body Front View
Show the character from head to toe, including their body proportions, clothing, and shoes.
3. Full-Body Back View
Show the character's hairstyle from behind, along with the back of their outfit and overall body silhouette.
The most important rule is to keep the character's appearance, clothing, hairstyle, and body proportions consistent across all three views.
Step 2: Use a Neutral Background and Soft Lighting
For character sheets, a simple neutral gray background works particularly well.
It helps eliminate distracting environmental details, making it easier for AI to focus on the character's appearance.
Pair the background with soft, even studio lighting so the character's facial features, clothing textures, and body proportions remain clearly visible.
Avoid overexposure, harsh shadows, and unnatural reflections on the skin.
Gray is a practical choice, but it's not the only option. A white background can also work well as long as the exposure is properly controlled.
Step 3: Keep Only One Clear Facial Reference
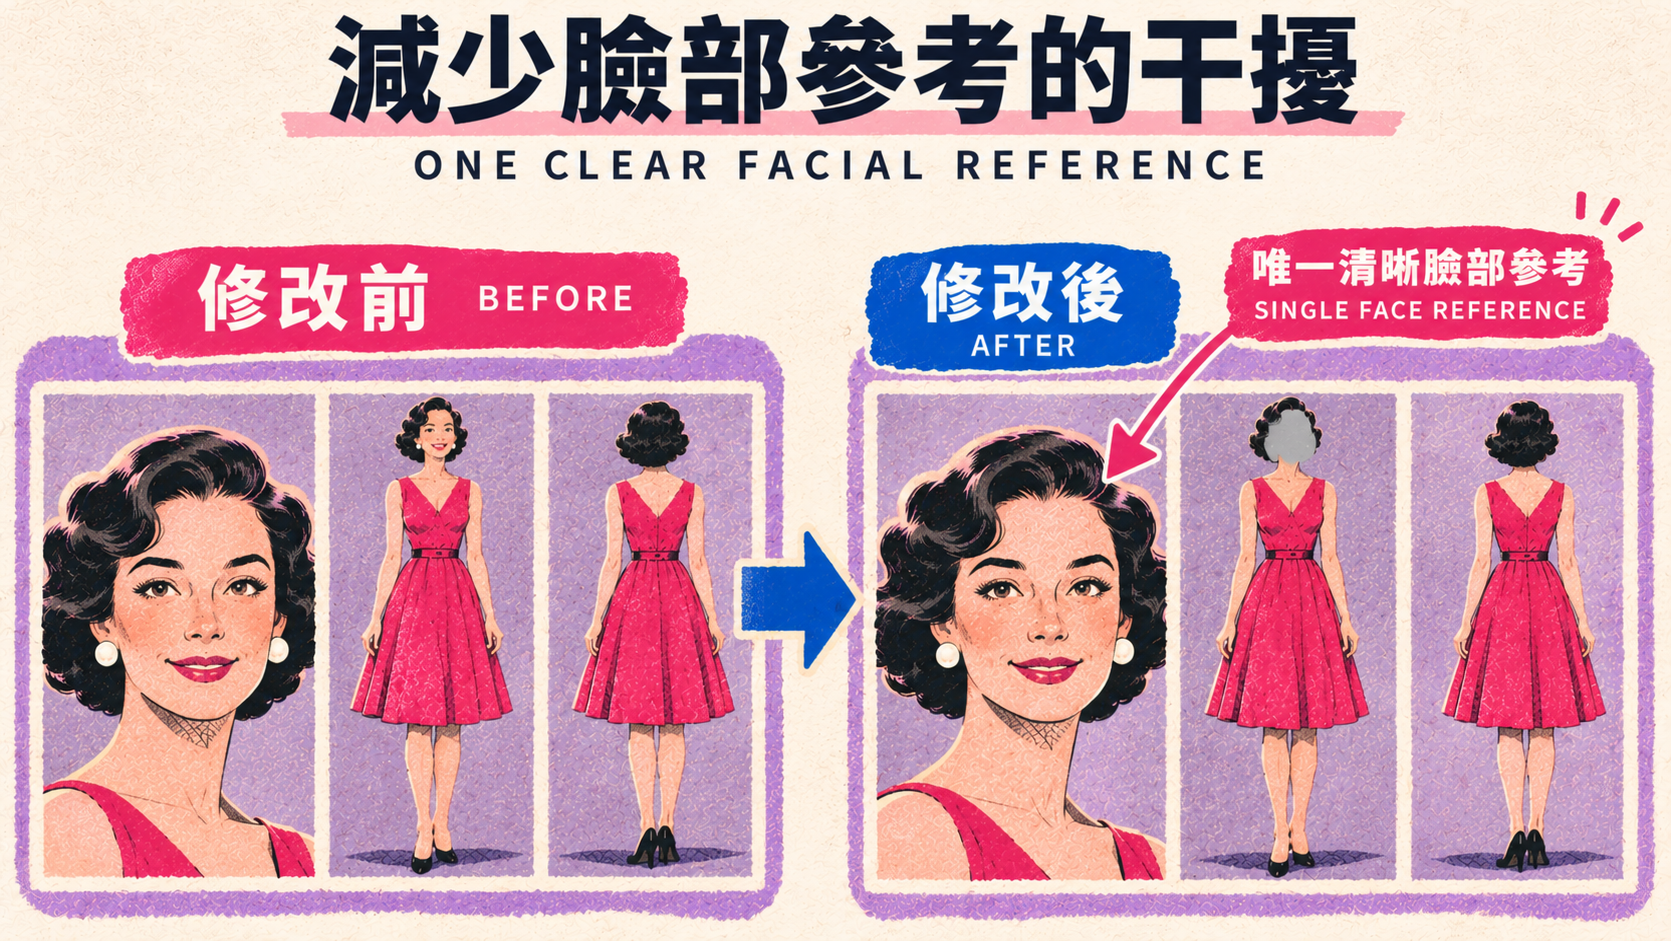
Once your character sheet is ready, try covering the facial features in the full-body front view with a gray color that matches the background.
Keep the face fully visible only in the close-up panel, leaving everything else unchanged.
This technique can help reduce the number of facial references within a single image, potentially preventing AI from mixing up facial features.
However, results may vary depending on the AI video model you're using.
4. Complete AI Prompt for Creating a Character Sheet
Before using the prompt below, replace the bracketed placeholder with your character description, including their age, facial features, hairstyle, body type, clothing, and shoes.
AI Prompt:
[Insert your character description here: age, facial features, hairstyle, body proportions, clothing, and shoes.]
Create a professional cinematic character reference sheet in a 16:9 landscape format. Divide the image into three equal-width panels arranged horizontally.
Use a solid neutral gray studio background with soft, even lighting and natural exposure. Preserve realistic skin textures and fine details. Do not include any additional environments, props, text labels, or harsh shadows.
Left Panel: Front-Facing Facial Close-Up. Show the character's head and shoulders, facing directly toward the camera. Their facial features, hairstyle, and distinctive facial details must be clearly visible.
Center Panel: Full-Body Front View. Show the character standing naturally in a relaxed, front-facing pose. Keep their entire body visible from head to toe, including their shoes, with no cropping.
Right Panel: Full-Body Back View. Show the character standing naturally with their back completely facing the camera. Keep their entire body visible from head to toe, with body proportions matching the front view.
All three panels must feature the exact same character. Maintain complete consistency in facial features, hairstyle, body proportions, clothing design, materials, colors, and accessories. Do not introduce any changes to the character's appearance between panels.
Bonus: AI Prompt for Covering the Face
After generating your character sheet, you can use an AI image editing tool to modify the full-body front view.
AI Image Editing Prompt:
Edit only the character's face in the full-body front-view panel of the character reference sheet.
Completely cover the facial features, including the eyes, eyebrows, nose, and mouth, using the exact same solid gray color as the background.
Preserve the original hairstyle, head outline, neck, body, clothing, and accessories without making any changes.
The facial close-up panel and full-body back-view panel must remain completely unchanged. Do not modify any other part of the image.
5. Important Props Need Their Own Reference Sheets, Too
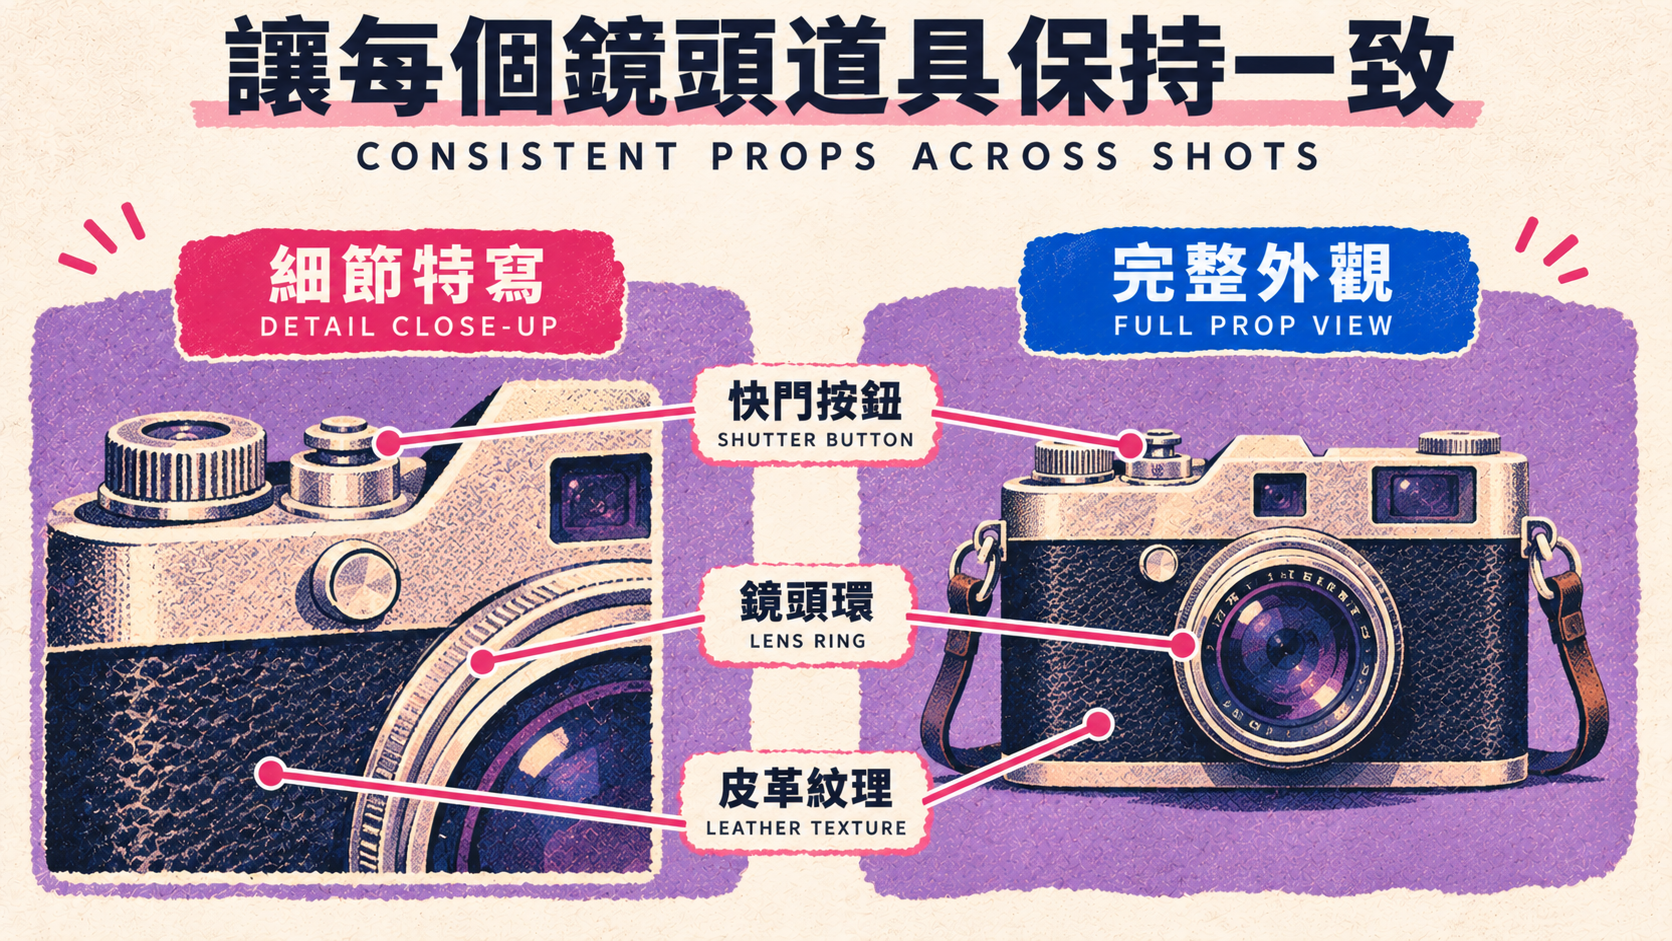
Character consistency is important, but don't forget about the objects they interact with.
If your AI video features an important prop—such as a book, smartphone, wand, weapon, or distinctive accessory—it's worth creating a separate prop reference sheet (Prop Sheet).
This helps AI recognize the prop's appearance and details, reducing unwanted changes in its shape, color, or material between shots.
For a prop reference sheet, we recommend using a 16:9 landscape canvas divided into two sections.
Left Panel: Prop Detail Close-Up
Highlight the prop's most important design elements, materials, and distinctive features.
Right Panel: Full Prop View
Show the entire prop, making sure its overall shape and proportions are clearly visible without cropping.
Complete AI Prompt for Creating a Prop Sheet
AI Prompt:
[Insert your prop description here: shape, materials, colors, and distinctive design details.]
Create a professional cinematic prop reference sheet in a 16:9 landscape format, divided into two side-by-side panels.
Use a solid neutral gray studio background with soft, even lighting. Do not include any additional environments, text labels, or harsh shadows.
Left Panel: Front-Facing Prop Detail Close-Up. Clearly showcase the prop's materials, surface textures, colors, and distinctive design features.
Right Panel: Full Prop View. Display the entire prop without cropping any part of it. Clearly show its overall shape and proportions.
Both panels must feature the exact same prop, maintaining complete consistency in shape, materials, colors, proportions, and design details. Do not redesign or alter the prop's appearance between panels.
6. Final Checklist Before Generating Your AI Video
Once you've finished creating your character and prop reference sheets, take a moment to check the following:
- Are the character's facial features clearly visible, and do all views show the same character?
- Are the clothing, hairstyle, accessories, and body proportions consistent?
- Are the character's full body and all props completely visible without cropping?
- Are the props consistent in shape, materials, and color?
- Are the images sharp and free of obvious distortions or missing details?
If you notice any inconsistencies, fix your reference images before moving on to video generation.
The key takeaway: Create clear, consistent character and prop reference sheets before generating your AI videos.
Doing so makes it easier for AI to understand your intended designs, minimizes unwanted appearance changes, and can save you time on repeated revisions.