In film and short-form social video, "keeping characters consistent across shots" and "tying the storyboard workflow together" have always been the challenges users face most. Creators usually have to keep switching between multiple tools for text scripts, image rendering and video rendering.
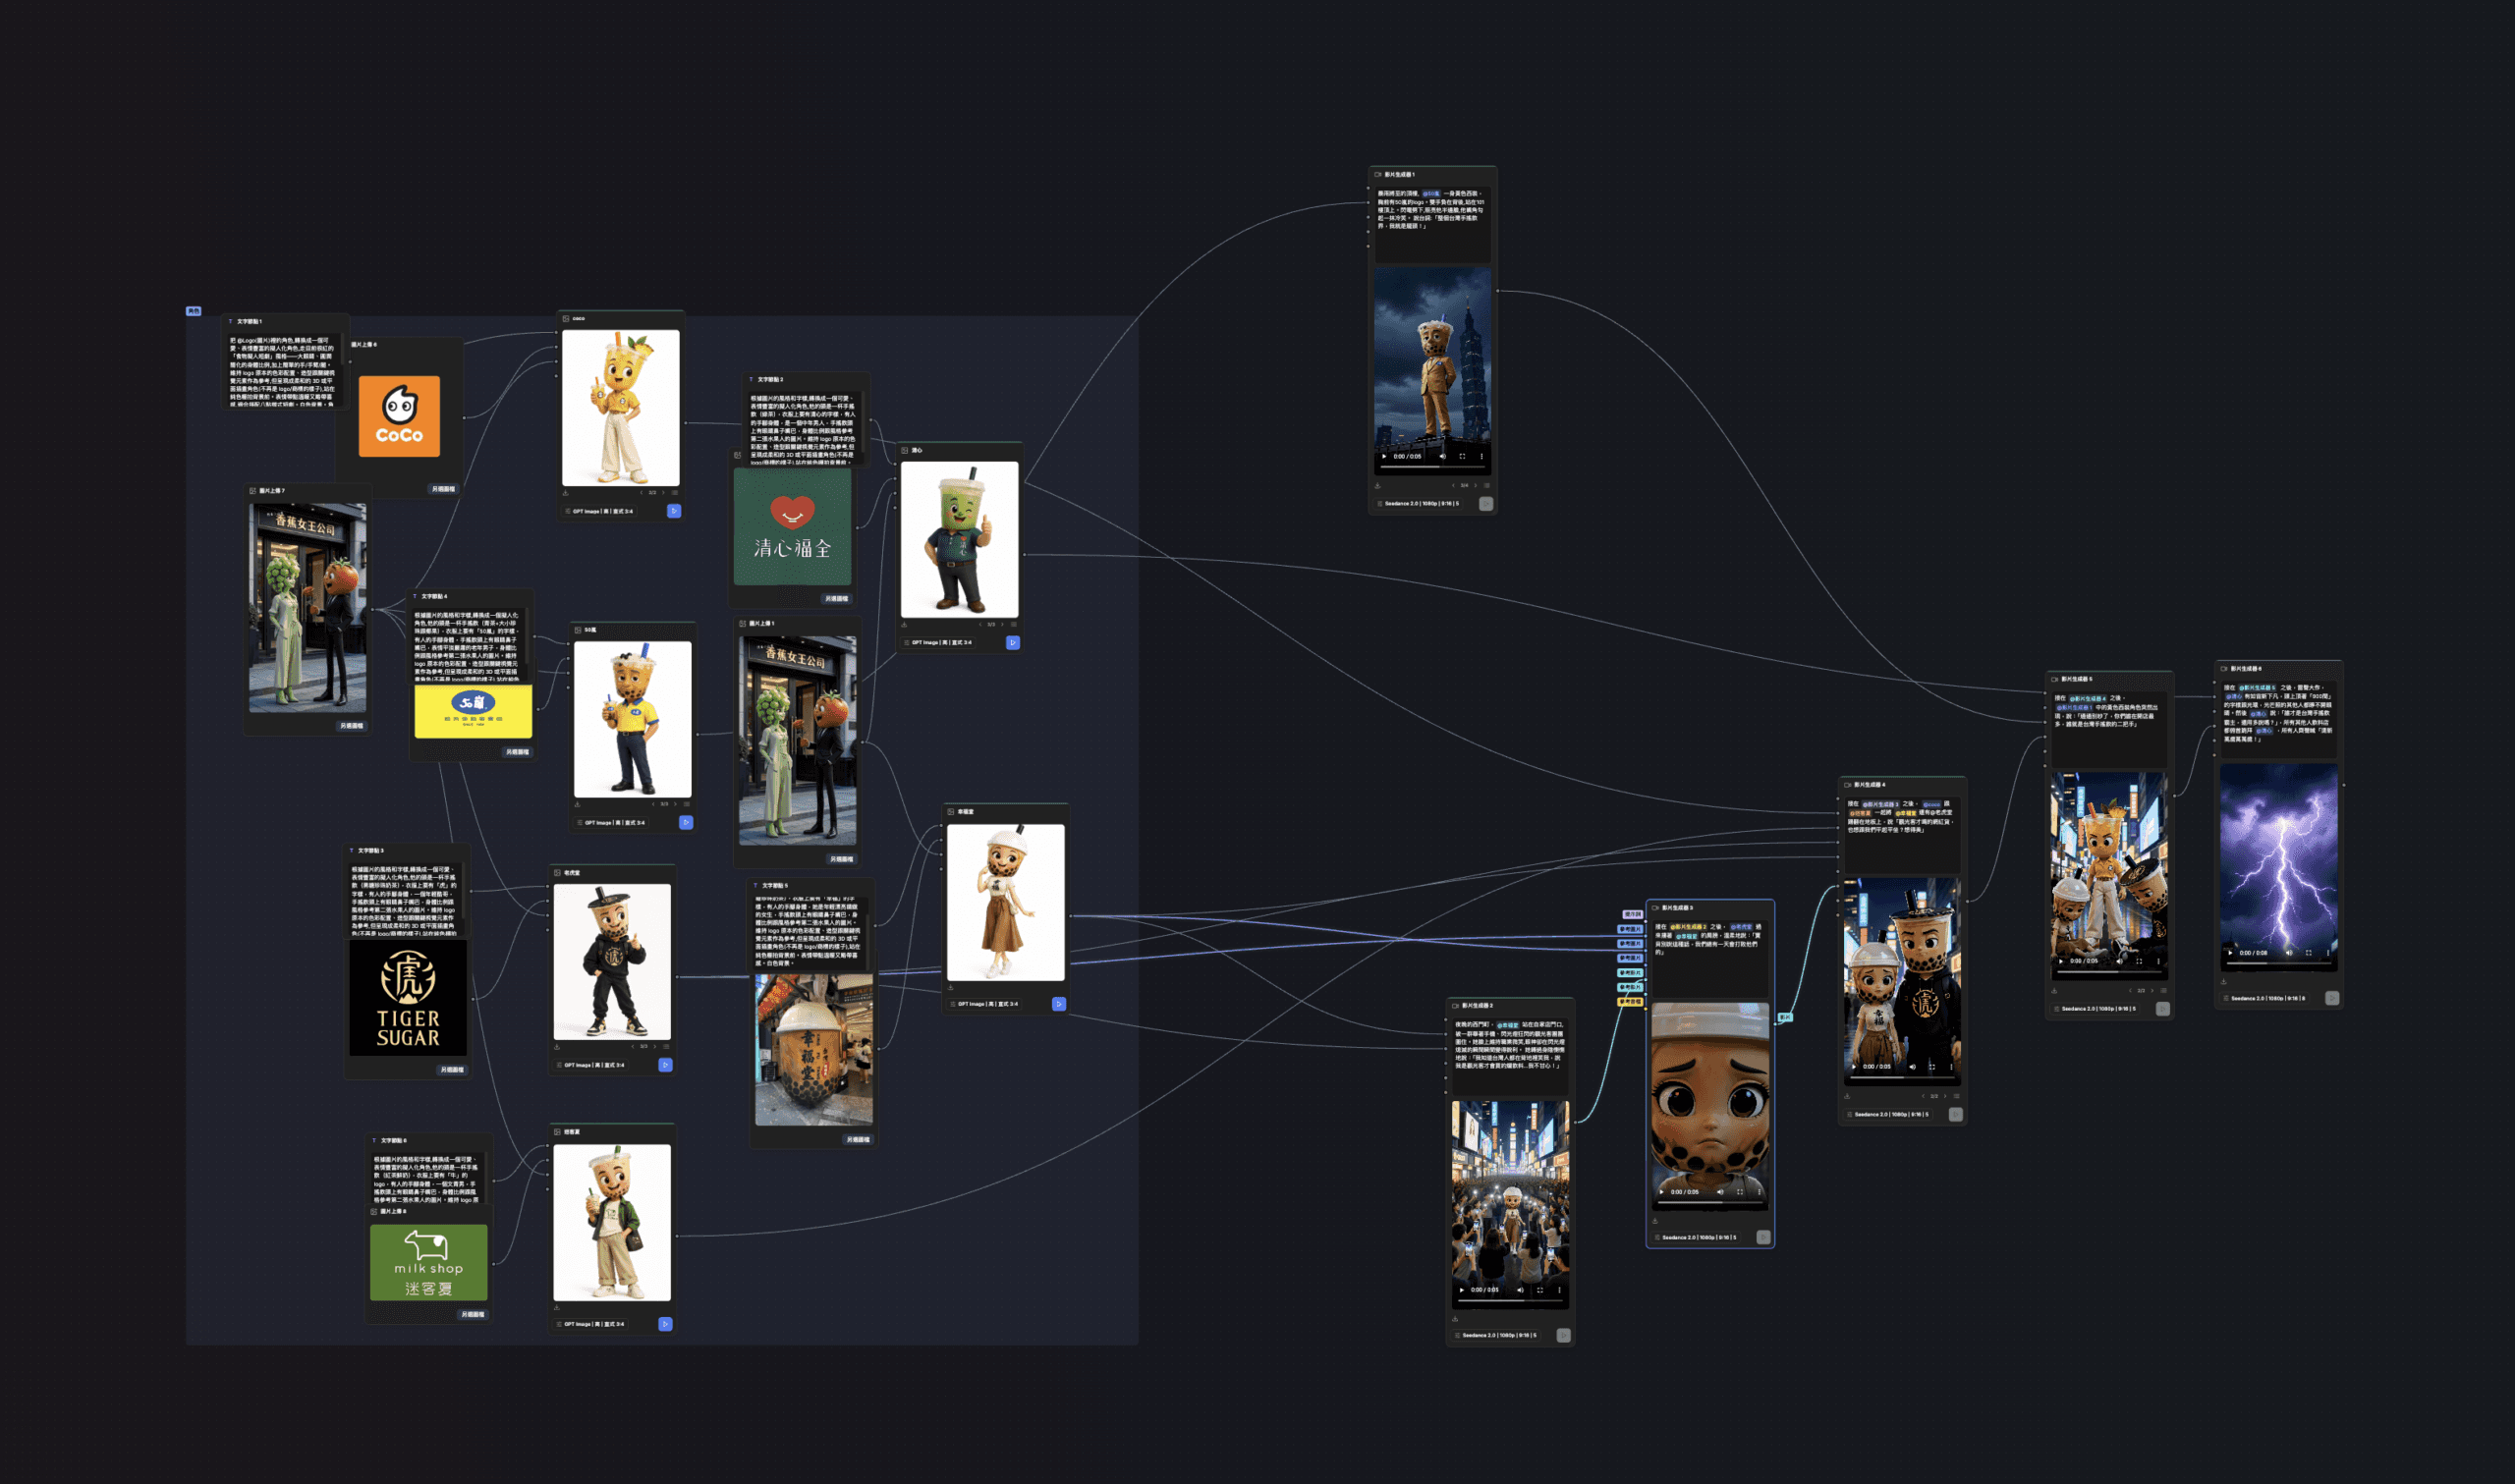
JifChat's "Infinite Canvas" brings text, image generation and video generation together on a single node-based visual canvas. Using a mini-drama that personifies five major Taiwanese bubble-tea brands as an example, this tutorial shows how to chain nodes together to complete the full pipeline, from brainstorming the script to the final video storyboard.
A viral mini-drama even a one-person team can make:
How the workflow goes:
- Generate the story and script.
- Make a 3D full-body image of each character so the characters stay on-model.
- Connect the characters and the script to create animated storyboard shots.
- Edit, export and integrate audio and video in post.
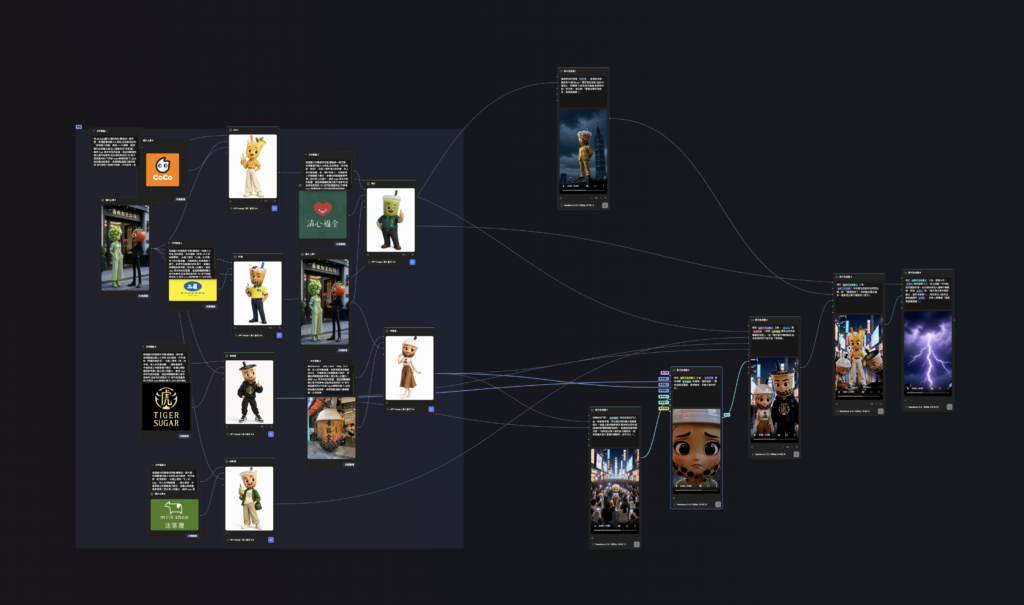
Step 1: Use a "text generation node" to develop the story and storyboard script
Before rendering any images, first build the mini-drama's core script on the canvas. The JifChat Infinite Canvas has built-in text generation nodes that can call a large language model directly to break the story down into structure and shot descriptions.
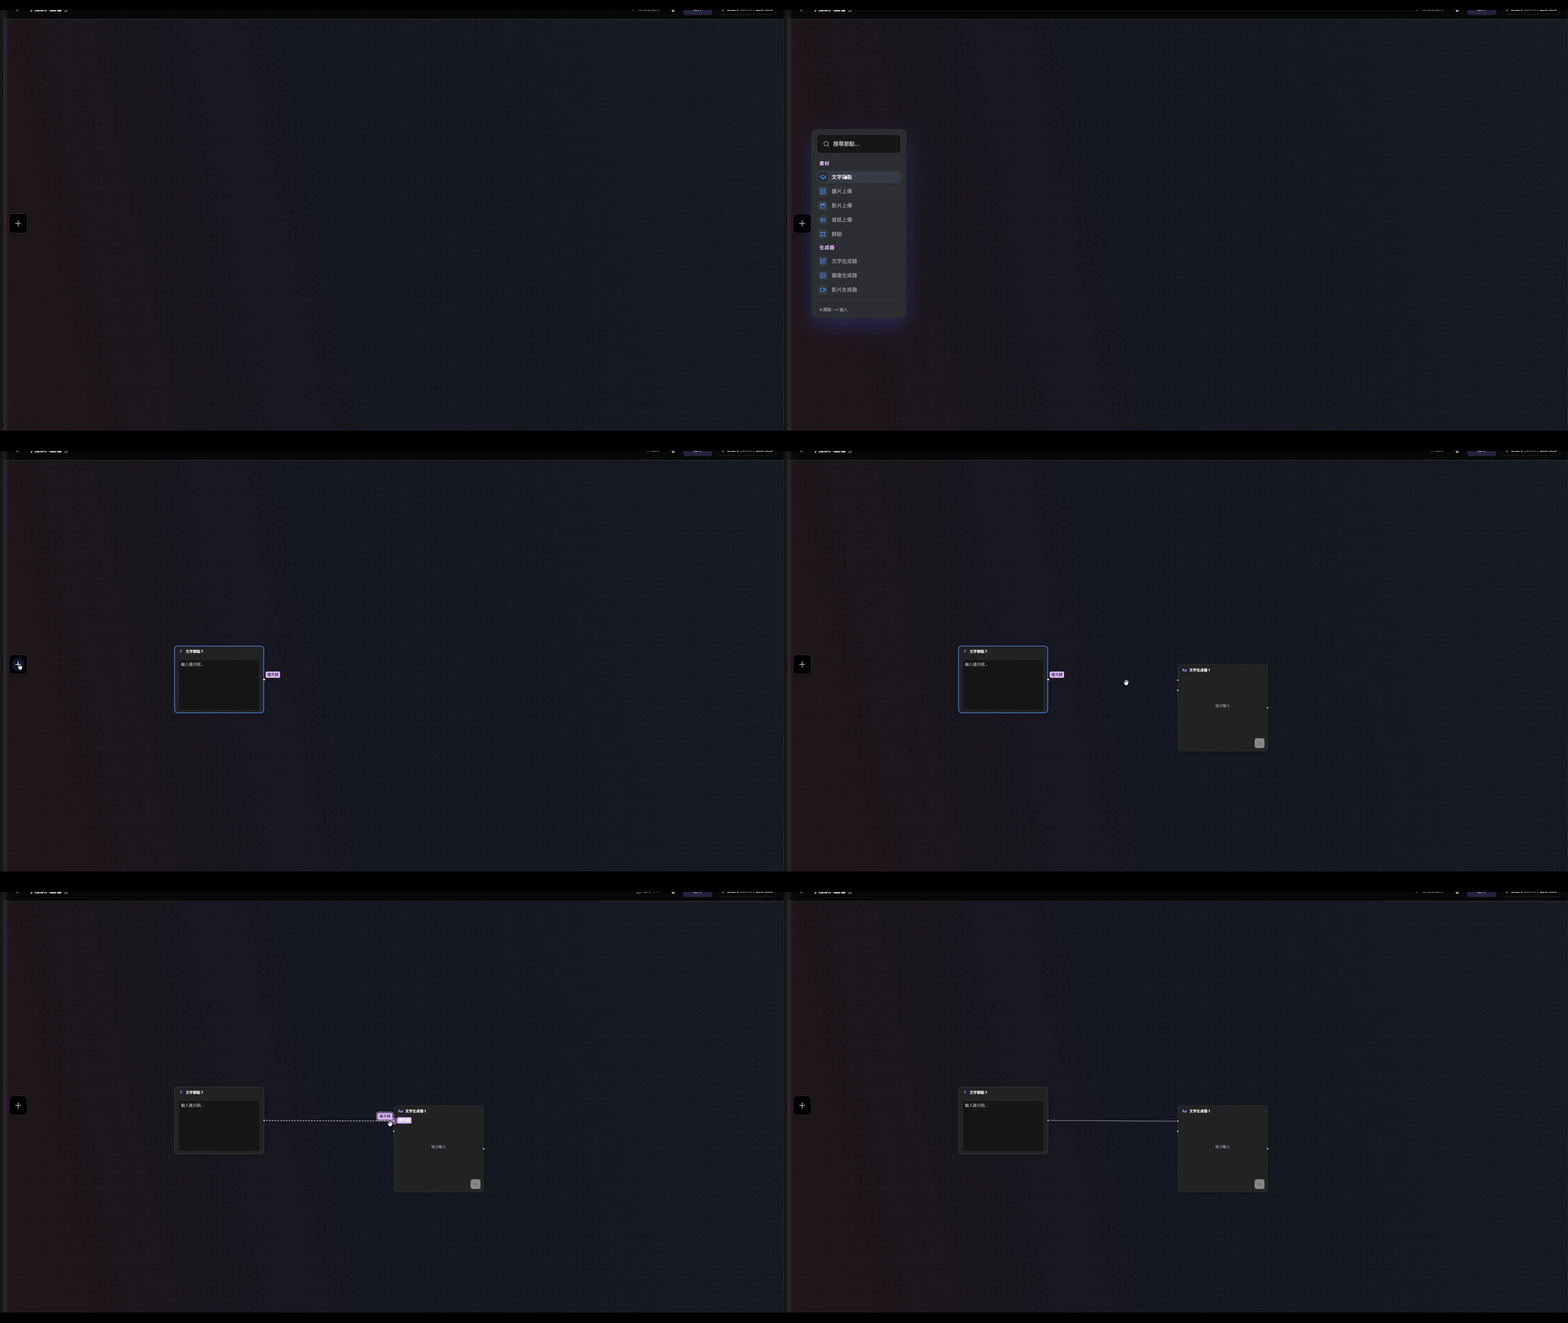
1. Add a Text Node
Click an empty spot on the canvas to add a "Text Node," then connect it to a "Text Generator."
2. Enter the story-concept prompt
The core plot of this example is "a battle for supremacy among the major bubble-tea brands, finally won by Ching Shin Fu Chuan, which has more than 900 stores across Taiwan." Enter the plot outline and visual style into the prompt box:
[Story concept]
Personified characters of Taiwanese bubble-tea brands (50 Lan, Ching Shin Fu Chuan, CoCo, Tiger Sugar, Milksha) are fighting for the title of "Taiwan's ultimate bubble-tea overlord." The factions face off on the cyberpunk streets of Taipei, and the battle is finally won by an overwhelming margin by "Ching Shin Fu Chuan," with more than 900 stores reaching every street and alley in Taiwan.
[Visual settings]
[Task requirements]
Please plan 6 consecutive storyboard shots, including:
3. The storyboard structure the text node produces
The text node breaks the plot down, in order, into 6 dramatic storyboard shots:
Shot 1
A rooftop with a storm about to break. 50 Lan, in a yellow suit with the 50 Lan logo on his chest, stands on top of Taipei 101 with his hands clasped behind his back. Lightning strikes, lighting up half of his face, and the corner of his mouth curls into a cold smile. Line: "In Taiwan's whole bubble-tea world, I am number one!"
Shot 2
Ximending at night. Xing Fu Tang stands in front of her shop, surrounded by a crowd of tourists holding up phones with flashes going off wildly. She keeps her professional smile, but the moment the flashes stop, her eyes turn sharp. She turns around and says darkly: "I know Taiwanese people laugh at me behind my back and say I'm a lousy drink only tourists buy... I won't accept it!"
Shot 3
Then Tiger Sugar comes over, puts an arm around Xing Fu Tang's shoulders and says gently: "Babe, don't talk like that. One day we'll beat them all."
Shot 4
CoCo and Milksha kick Xing Fu Tang and Tiger Sugar to the floor together and say: "Influencer drinks only tourists buy, and you think you're on our level? Dream on."
Shot 5
50 Lan suddenly appears and says: "Everyone stop arguing. Whoever has the most stores is number two in Taiwan's bubble-tea world."
Shot 6
Then thunder roars, and Ching Shin Fu Chuan descends like Zeus, with the words "900 stores" and a halo above his head, shining so brightly the others can't open their eyes. Then he says: "Do I even need to say who the true overlord of Taiwanese bubble tea is?" All the other drink shops bow and kneel, and everyone shouts in unison: "Long live Ching Shin, forever and ever!"
Step 2: Use "image generation nodes" to design the characters
Once the storyboard script is done, the next step is turning the five bubble-tea brands into 3D characters with a unified style. To keep the characters on-model in later shots, you must first generate a "standard full-body image" of each character on the canvas as the consistency anchor for the whole film.
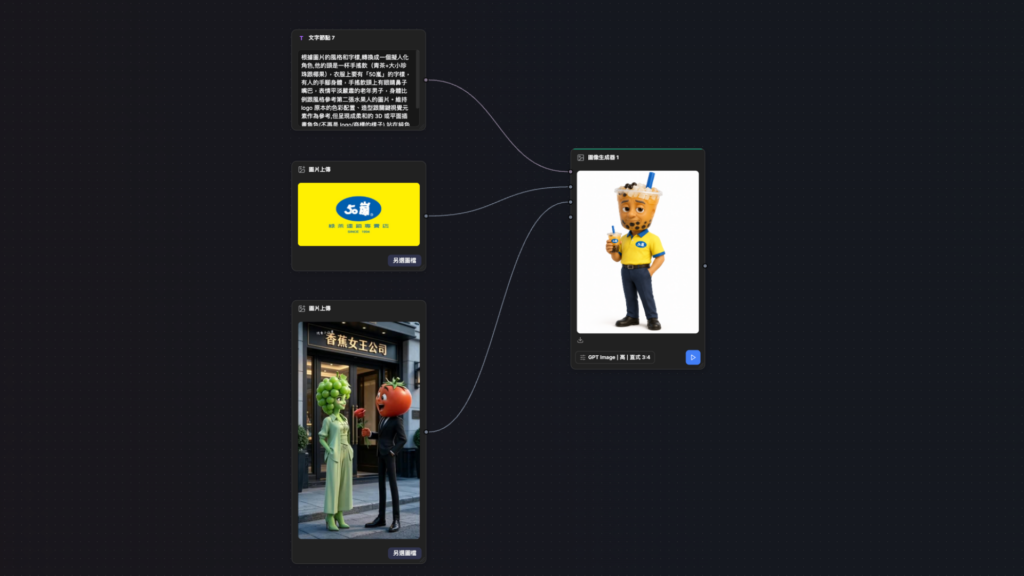
1. Upload brand identity assets
Click "Upload Image" on the left side of the canvas and import each bubble-tea brand's official identity assets (for example: logo, shop sign or classic packaging):
CoCo: bright orange, the signature smiling outline.
50 Lan: a vivid yellow-and-blue contrasting color scheme.
Ching Shin Fu Chuan: the classic green background with a red heart logo.
Tiger Sugar: black-and-gold tiger stripes, a streetwear vibe.
Milksha: grass green, natural ranch and dairy-cow imagery.
2. Upload a style reference image
If you want all the characters to have exactly the same modeling proportions and lighting texture, you can also provide a visual style baseline.
Click "Upload Image " on the canvas and import a sample image in the target visual style. Every character generated afterward will reference the materials and rendering style of this image.
3. Create "image generation nodes" and connect them
Next to each brand's identity image and the style image, add an "Image Generation" node.
Draw a connection from the brand-asset node to the image node's "content / feature reference" input.
At the same time, draw a connection from the style reference node to the "Style Reference" input.
With this dual image guidance, the AI can lock in each brand's signature colors while keeping a consistent 3D designer-toy look.
4. Set a unified style prompt
The prompt should fix the overall model specs and swap out only the clothing and accessory descriptions for each character.
Node parameters:
- Model: GPT Image 2
- Quality: High
- Image size: Portrait 3:4
Prompt (50 Lan):
Based on the style and lettering in the image, turn it into a personified character whose head is a cup of bubble tea (green tea with large and small pearls and coconut jelly). The clothes must have the words "50 Lan" on them. It has a human body, arms and legs, and the bubble-tea head has eyes, a nose and a mouth; it is an elderly man with a flat, serious expression, with body proportions and style based on the fruit-person in the second image. Keep the logo's original color scheme, shapes and key visual elements as a reference, but render it as a soft 3D or flat illustrated character (no longer looking like a logo/trademark), standing in front of a solid-color studio backdrop. The expression is warm with a slightly comic touch. White background.
5. Generate and lock in the full-body character anchors
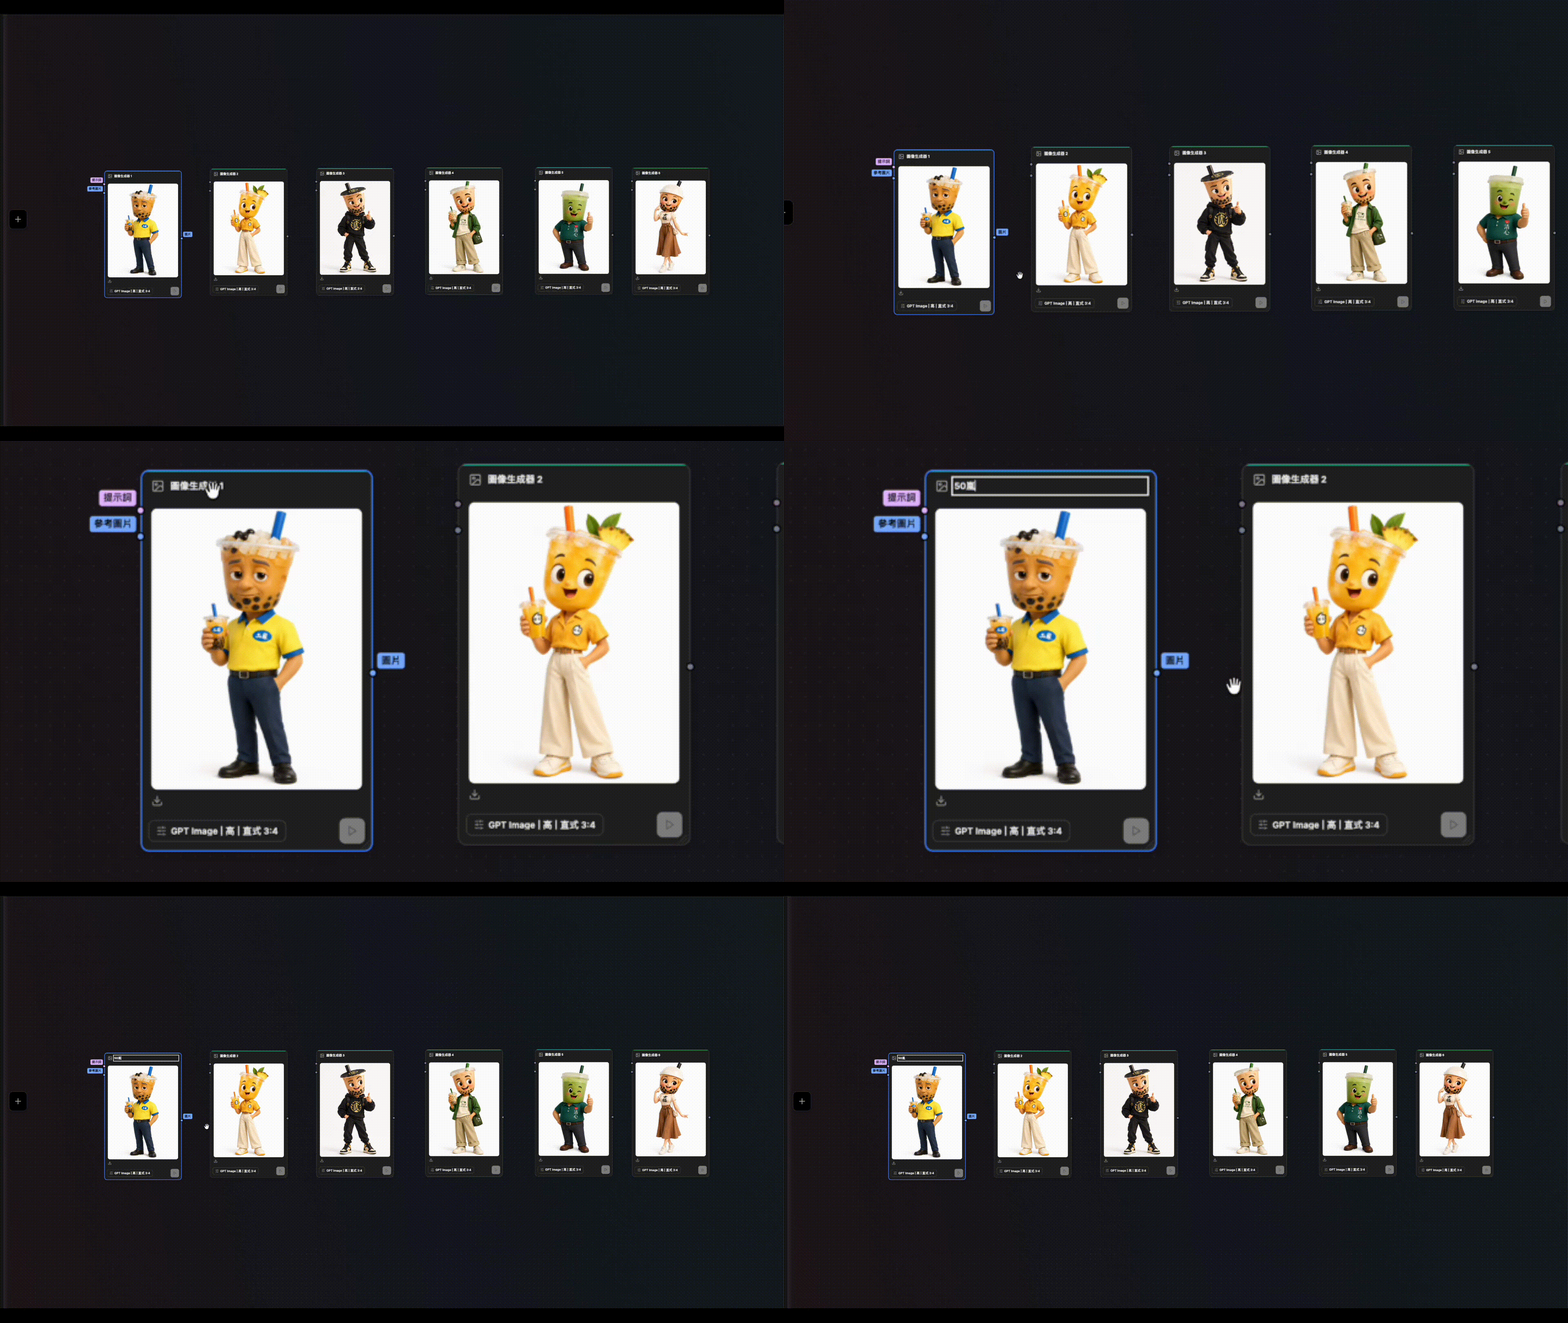
For each brand, pick the full-body front image with the most accurate look and clearest proportions. To make them easier to reference later, it is a good idea to rename the character image nodes first:
Renaming tip: double-click the title bar at the top of any node to edit its name directly (for example, name them "50 Lan" and "Ching Shin").
Step 3: Combine the characters and script to create animated storyboard shots
With the full-body character art and storyboard text ready, it is time for the motion stage. Here we use Seedance 2.0, which supports character feature references, and use the canvas's " @ " tagging feature to keep characters consistent in the moving footage.
1. Create video generation nodes
On the right side of the canvas, add 6 "Video Generation nodes " one after another, matching the 6 shots in the script.
Node parameters:
- Model: Seedance 2.0 Reference-to-Video
- Resolution: 1080p
- Aspect ratio: 9:16
- Video length: 5
Use the storyboard content from Step 1 as the prompts.
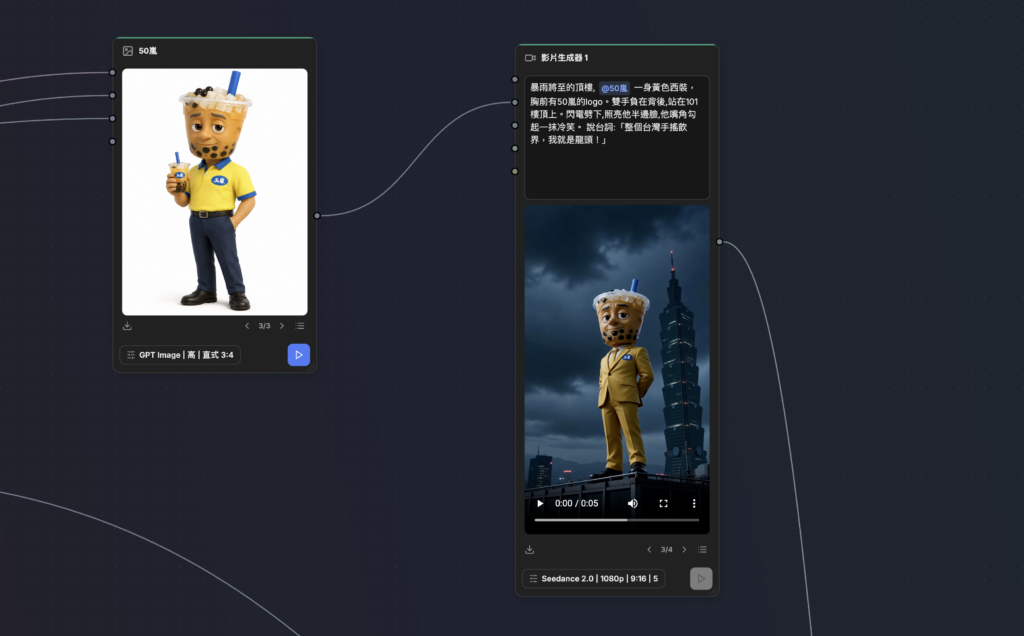
2. Tag characters with @
Type @ in the video node's prompt box to tag a character:
- After you type @ , a drop-down menu appears listing the named image nodes on the canvas.
- Click the matching character name, and the model will use that still character image as its feature reference, strictly locking the clothing, facial features and colors when generating motion.
- Click Generate, and each node will produce a high-quality clip of about 4–5 seconds.
3. Chain the previous shot (Video Reference) for better consistency across shots
Besides locking characters with still images, Seedance 2.0 also supports Video Reference:
- Connecting: after generating the first shot, if needed, draw a connection to "the input of the next shot."
- Result: later shots not only keep the characters' appearance from the previous shot but also carry over the scene's lighting and color, weather (rain and smoke) and camera momentum, making cuts feel more natural and smooth.
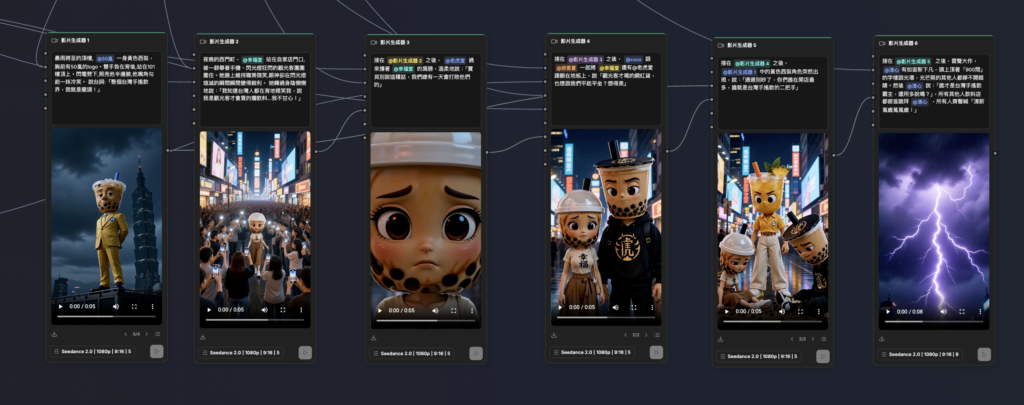
4. Line up nodes horizontally on the canvas to check continuity
Arrange the 6 video nodes horizontally from left to right and preview them in order right on the canvas to check:
- Whether the facial features and clothing of characters brought in with @ tags stay consistent across shots.
- Whether the lighting and rainy-night tones inherited through connections flow smoothly from shot to shot.
- If one shot's movement is not ideal, just adjust that node's camera-movement prompt and regenerate it on its own, without affecting the finished shots before and after it.
Step 4: Export the videos and integrate them in post-production
Once you have confirmed on the canvas that the motion and continuity of the 5 storyboard videos are right, you can download the footage and assemble it into the finished mini-drama.
1. Download the generated video clips
In the JifChat canvas, select each finished video node:
- Click the "Download " icon at the top right of the node to save the five 4–5 second high-quality MP4 files to your computer one by one.
- It is a good idea to name the files in storyboard order (such as scene_01.mp4 to scene_05.mp4) to make sorting easier when you import them.
2. Import into a free editing tool (Canva or CapCut)
A 15–20 second short video like this does not need complex professional editing software; common free tools can finish it quickly:
- Canva: create a vertical video project (1080x1920) and drag the 5 clips onto the timeline. Good for quickly adding title cards, transitions and layouts.
- CapCut: good when you need finer sound-effect syncing, automatic captions or speed ramping.
3. Key points for editing and sound
- Trim flawed frames: if the start or end of an AI-generated clip occasionally shows slight distortion, trim about 0.5 seconds from each end of the clip and keep the section where the motion is most stable.
- Add ambient sound and sound effects (SFX):
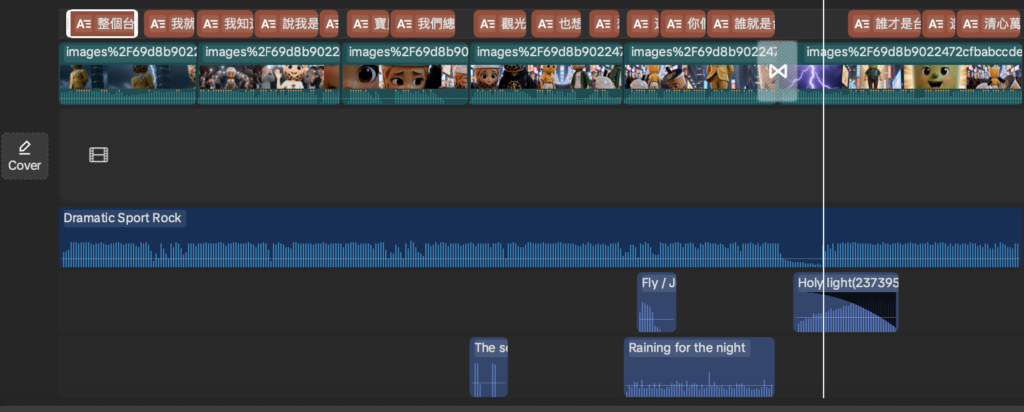
4. Export the finished video
After syncing the audio and video and checking the title cards, export the video as a 1080p (or 4K), 60fps MP4, and it is ready to post directly to Instagram Reels, TikTok or YouTube Shorts.